Monday, March 29, 2010

vespa update...

as mentioned in a previous post, i was working on a vespa order. here's an update on how that turned out...

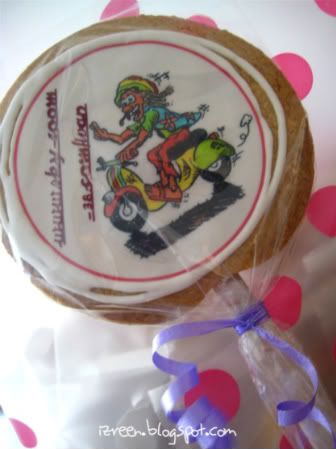
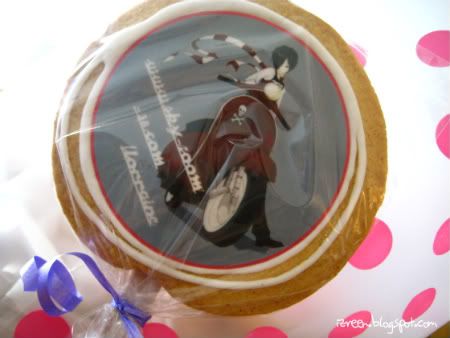
working on the artwork was much simpler than i originally imagined as my lovely clients had arranged to have carricatures made for each of their friends (and where not possible, they found similar ones online). so all i had to do was minimal touch up of the artwork.

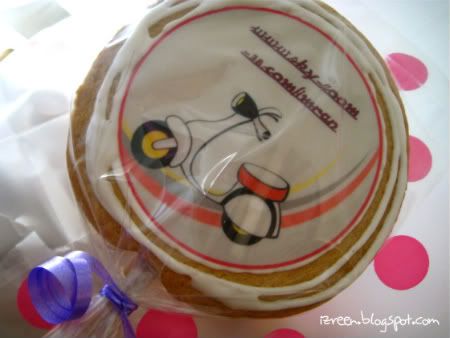
i also found the vespa font and included a website address: www.sky-zoom-38.com/ folowed by each person's name. it's not an actual website of course...sky's the birthday girl & they were celebrating her 38th birthday...so sky-zoom-38 in vespa font, get it?

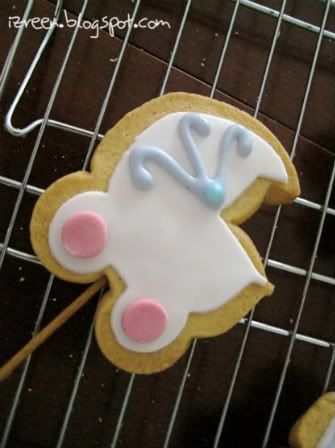
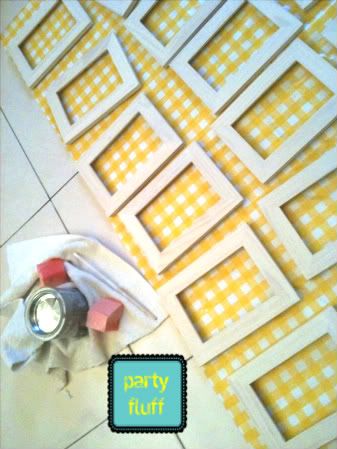
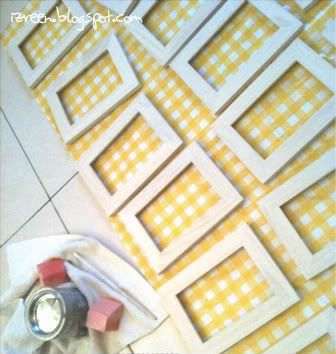
the tricky part was making XXL-sized bollipops. i usually make them about five to six cm in diametre but this time, i was asked to make them double the size! i had a few trial runs on these, prior to the actual delivery date, just to make sure the sticks were stable enough to hold the gigantic biccies...here's what it looked like:

Photobucket

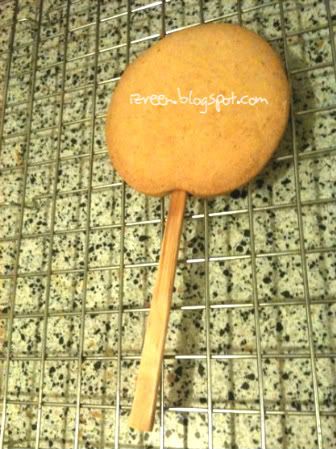
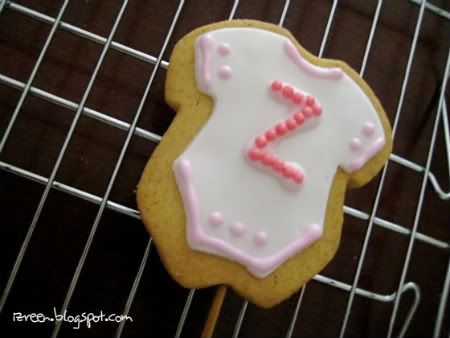
i couldn't resist placing the watermark right in the centre of the bollie ;)

thankfully, after a few trials, the bollies passed "my confidence test"...here are some of them, decorated & packed...check out the cool carricatures!

Photobucket

Photobucket

 Photobucket

Photobucket

Photobucket

Photobucket

Photobucket

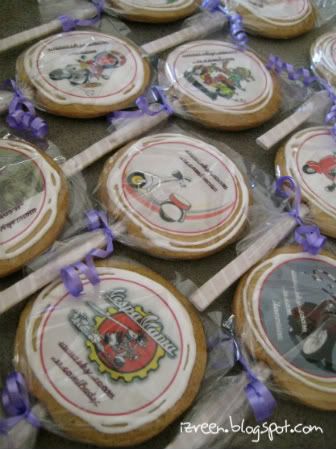
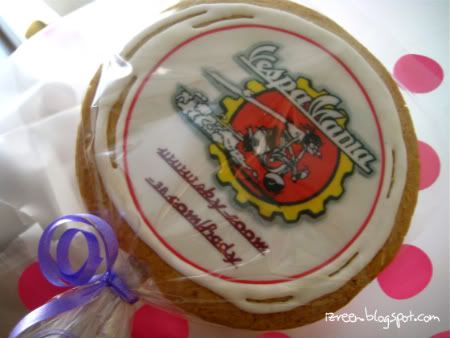
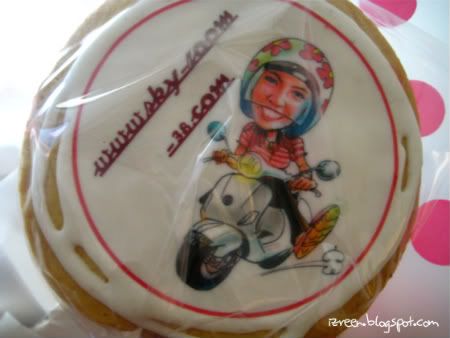
this last one is a carricature of the birthday girl...how adorable! guests at the party loved the bollies so much that i received two repeat orders the very next day ;)

Wednesday, March 24, 2010

baby zara's onesies & prams...

a couple of weeks ago, our close friends, naz & sheahnee, held a potong jambul ceremony (like the one i posted here) to welcome their newborn baby, zara aaliyah, into this world. i couldn't join them but i managed to bake them a lil gift as my contribution to welcoming lil zara into our lives.

Photobucket

here's what i got from spare biscuit dough, sugar paste and icing...

Photobucket

Photobucket

Photobucket

this was my first attempt at using both sugar paste & royal icing as decor for my cookies so i was surprised to find that they were actually quite easy to work with. i'm definitely going to try using more of these again real soon!

only problem i faced was trying to keep ilaika away from my work table...she kept wanting to steal the biscuits...i don't blame her - these onesies & prams were just SO adorably cute ;)

Tuesday, March 23, 2010

share the love, grab a button...and a few other links too!

just for fun, i created my own blog button. i have no knowledge on html etc but i really wanted to attempt putting up my own blog button. every blog seemed to have one so i figured it probably wasn't rocket science...hence, i did a lil googling and found this tutorial by A Heart for Home. it's simple & straightforward...and i was right, it really isn't rocket science! click here for the tutorial and you'll know what i mean...

i placed the fluff & stuff button on the right column of this blog  (right after everything else i've plonked there). scroll down thru and you'll see the button as well as the html script...but since you were nice enough to read this post, i've placed it here too...


fluff & stuff


you probably know how to do this already but if you don't, just copy and paste this html script to the add gadget function of your layout page....that's, of course, if you'd like to add it to your blog.! let me know if you do so i can see for myself if it works on another blog ;)

oh have you noticed some other things i did? yup, i added a signature followed by a linkwithin widget after each post (see the bottom of this post where you can see "you might like" followed by three related posts...) ...

fantastic! well it's fantastic to me anyways heheh. i'm just so excited that i did all this. i mean, i still hv no idea what all the html stuff mean but i know they definitely work cos they appear fine on the blog ;) so yay me!

visit the linkwithin site if you'd like to have this widget on your blog too. 

if you're keen on adding a signature to your blog, follow this great tutorial by www.kevinandamanda.com (sound familiar? i mentioned this site on a previous post ). it's a great site and amanda's tutorials are SO easy to follow. the next one i'm gonna read up is on how to convert my own handwriting into a font...now, how cool is that?! will keep you posted when i get around to doing it...

oh one last thing - if like me, after having succesfully put up both, your signature appears after the linkwithin widget as opposed to before the widget, let me know...i'll put up a separate post on this. it took me a while and a bit of trial & error to figure it out; i had to look up a few different sites and put them together! but it was really simple - a matter of copy & paste...i just need to backtrack and take note of what i did...!

Monday, March 22, 2010

a lil insight on what i do...

just after i posted the pics of ilaika's butterfly party, someone said on twitter that i should start a party planning business and my response was...this IS the start ;) so i guess perhaps i should elaborate more on what i do do and where all this is headed...

i actually have a full-time job, like a nine to five day job (though the hours are more like nine to seven and on some occasions, it goes on til much much later).  i work in the hospitality industry where i handle pr & marketing for a convention centre and its two f&b outlets.

however, as some of you may know, i've always loved baking and since i've had ilaika, i've especially enjoyed it even more cos i've had an excuse to indulge in her parties.  i discovered that not only was i not too bad a baker, but i was also quite a closet party planner! 

so just after ilaika's second birthday bash, a friend of mine insisted i take up an order for biscuits for her own daughter's party & that's where it all began. i slowly received orders every now and then. it's come to a point where now, i have an order or two a week. somewhere in between, i've also helped plan a few parties and indulged in more of ilaika's parties, as well as designed invitations.

so what started as a hobby & passion is now slowly evolving to a business. 

thinking big picture, i named the brand, fluff & stuff. 

fluff could be defined as frivolous things and stuff as the essence or substantial element of something. these definitions seemed apt for the things i planned to do. the positioning was whilst all my party decor & goodies, intricate attention to detail & insistence on having every single thing go with the theme are merely fluff & stuff, they are items that i've just got to have. i therefore can totally relate to the temptation of wanting to have everything simply perfect. so my role is assisting my clients in indulging those tempting desires ;)

from there, i decided to name the party planning portion, party fluff and the baking portion, sweet stuff.

incidently, this weekend, i spent a lil bit of time trying to come up with a few logos and so far, these were the few i came up with...


any thoughts on these?

i still need to fine tune the logos, branding and taglines and am also in the process of setting up a proper website, so for now, this blog and these logos should suffice....

in the meantime, drop me a line or two if you have a party you'd like to indulge in. with another year to ilaika's next birthday, the closet party planner in me is simply itching to plan another party ;)

Sunday, March 21, 2010

vespa, anyone...?

am currently working on an order with a vespa theme.

now, i'm no motor-expert...in fact, the only thing i ever do to my car is fill up petrol so when i think of vespa, a few things & images come to mind - vintage, rome & audrey hepburn...


- scenes from roman holiday -

needing more fuel for inspiration, i started surfing for other pics...here are a few i really like...


 - awww how cute is this battery-operated peg perego vespa gt for kids? can't decide which is cuter : the mini vespa or the mini love birds! -
(pic courtesy of vespa obsession)


- fancy a bubblegum vespa? ok, it's actually called a vespa rosa but it's so bubblegummy pink! -


- and how about a gap designed versa splash? -

if only malaysian weather wasn't so hot & humid and more importantly if only our motorists weren't so crazy...i might just be tempted to buy me one of these! perhaps i'll look for one of the mini ones for ilaika to zoom around in!

Saturday, March 20, 2010

ice cream, anyone...?

i've just stumbled on this lovely party post by becca of birthday girl. it's a great party organised by catherine clay for her daughter's 4th birthday.  i just love the colours and articulate attention to detail. and of course, what a fabulous idea for a child's party - a tempting ice cream buffet AND a fun photo booth!

these party pics from catherine's blog were shared on becca's post...


i know it's a little pre-mature but i think i've found my inspiration for ilaika's next party ;p

Thursday, March 18, 2010

a baby's welcome...

i was spring cleaning my iphoto pics and came across these from three years ago. i just remembered i actually had a draft blog post which i had started but never completed!

these are pics of ilaika's "potong jambul" ceremony*. the theme was anything baby and the colours were yellow, orange and pink...

* in the malay culture, the "potong jambul" ceremony is traditionally a ceremony whereby a baby's head is shaven to "cleanse" him or her. nowadays the ceremony, held forty days after the baby is born, seems to signify a thanksgiving ritual and a baby's welcome. literally translated, "potong jambul" means "cut hair" which is exactly what the ceremony is about. in my family, the ritual also includes giving the baby its first taste of "sweet" and "salty" and a "merenjis" ceremony (perhaps a malay version of the baptism ceremony) as well as placing the baby's feet on a tray of sand somewhat similar to marking its footprint in the sand...possibly to signify its first step? am afraid i am no expert in the malay culture so perhaps i should find out more from my mum...!

Photobucket

- the venue -

Photobucket

- the lovely teak cradle, a present from my mum -

Photobucket

- the "equipment" -
top row from L to R :
1. the "equipment" laid out on the table; 2. a decorated coconut to place the hair once it's cut.
bottom row from L to R :
1. a tray of sand for the "footprint" part of the ceremony; 2. mini scissors to cut the baby's hair.

Photobucket

- the "equipment" -
top row from L to R :
1. the sweet & salty "porridge"; 2. the leaf to "merenjis" the baby.
bottom row from L to R :
1. the "bunga rampai" for "merenjis" - it's a malay-style potpourri made of thinly sliced fresh leaves, fresh rose petals and rose scented fragrance; 2. silver cradles, the favours for the vip guests.

Photobucket

- the decor & gifts -
top row from L to R :
1. baby mittens sewn with ribbons and buttons, which we used to place the "bunga rampai" as favours for the guests; 2. mini pink cradles for the table decor.
bottom row from L to R :
1. more table decor; 2. pink balloons were placed all around the patio.

Photobucket

- sweet stuff -
top row from L to R :
1. pink, yellow & orange ribbons for the baskets that held the cupcake favours; 2. mini cupcakes with frosting to match the colour theme.
bottom row from L to R :
1. jelly in shapes of baby things; 2. cupcakes topped with frosting and fondant in shapes of safety pins, rocking horses, rattles and bibs.


oh and here's a pic of us as proud first-time parents...

Photobucket

Photobucket

time sure flies...a part of me still can't believe that it's been three years since i first held ilaika in my arms...and looking at her now, it's hard to believe that she was ever that tiny!

Tuesday, March 16, 2010

a prettier look & a collage how-to...

you may have noticed a slight difference in the style of pics that i posted in my last couple of posts (here & here) compared to the pics in the posts prior to these. can you spot the difference...?
 
Photobucket

- older posts -

Photobucket

- newer post -

i've decided to stick to this newer style..looks cleaner, simpler and prettier too. any thoughts on these?

oh, i've also discovered a collage function on photobucket - the perfect answer for when i have too many lovely pics to share ;) like the pics from ilaika's party...

Photobucket

it's rather hidden though so i didn't even know it existed! so i thought you might appreciate this lil collage how-to:

1. of course, you have to start with a photobucket account with pics uploaded to an album (if you don't, it's simple and free so click here for the photobucket site)...

2. choose an album to view & look at the top. there should be an option for "edit images" as circled below:


3. then click on the button that says "create a collage"...


4. you'll see this page...just choose the type of collage you'd like (on the left) & click "load photo" to select the pics...


5. once you're happy with the pics & proportions, choose "customise" for the final step...


6. here, you can resize, edit, add text etc. 


7. once you're happy with the whole collage, just click "save a copy"....


...and then sit back and admire ;)

Photobucket

Sunday, March 14, 2010

d.i.y. butterfly frames...up close & personal...

i shared some of these pics in my previous post but they were kinda small there. i'm posting  them again so you can see a close up of the personalised frames. this was the first time i tried out d.i.y. gifts and they were so pretty, they do deserve a post just on them ;)

i originally wanted to frame a 3-D butterfly cut out which meant the frame needed depth. this is the one i made for the cake table decor:

Photobucket

unfortunately, this frame was a lil too pricey as i had to buy and make sixty frames for the sixty kids that were coming to the party so i had to settle for a simpler frame...


these plain solid pine frames from ikea were perfect as they came with durable plastic instead of glass - definitely more child friendly!

i love the antique white stain effect that gives wood a really romantic look so i decided to have these frames stained white. i chose white stain instead of paint so that the stain dries clear and the wood grains can still be seen. you may have read about my "staining" work-in-progress here but in case you missed it, here's a pic of the frames drying after the second coat of stain.

Photobucket

i would really have preferred having done an extra coat or two but after the second coat, i thought they were pretty as is and i had to wait 4 - 5 hours between each coat so you can imagine, it was time consuming to add on more coats. and really, the kids might not be able to tell the difference between two or three coats anyways! 

then i printed their names in a pretty font. for the girls, it was their full first name and the boys, their name without the first letter. here's why:

Photobucket

- for the girls -
 
Photobucket

- for the boys -

as you can see, the girls' frames had a larger butterfly cut out so it looked more girly and the boys' ones had a tiny butterfly but their first initial was a huge cut out letter which looked less girly and way cooler ;) 

i made a special one for ilaika too without the plastic cover so the butterfly had the 3-D effect...(i didn't want to do this for the other girls cos i was worried they'd tear off the butterfly!)...

Photobucket


i fell in love with this idea and felt it was perfect for gifts*. i figured the kids may not cherish it so much right now but i'd like to think they might when they're a little older. i also imagined the parents hanging these on the wall of the hallway and for the ones with siblings, they'd have a few frames in a row with all their names. how absolutely lovely!

* p.s. - they're also perfect cos they're so simple to make and won't burn a hole in your pocket ;) let me know if you try this d.i.y....would love to see how it turns out...

Related Posts with Thumbnails